Copying Slides with a digital camera
Copying Slides with a digital camera
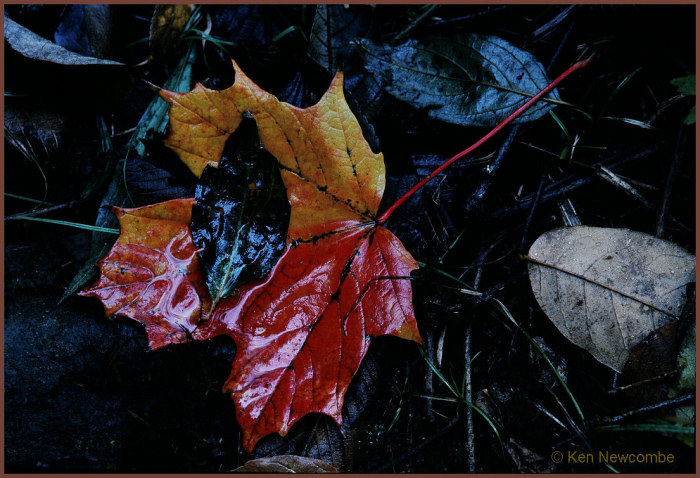
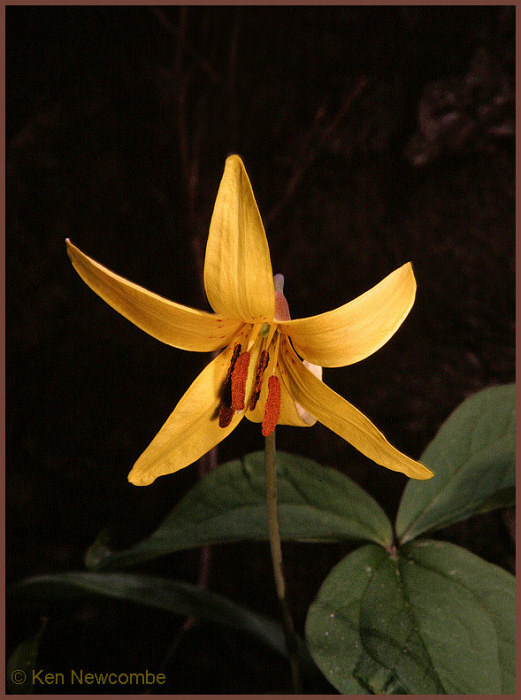
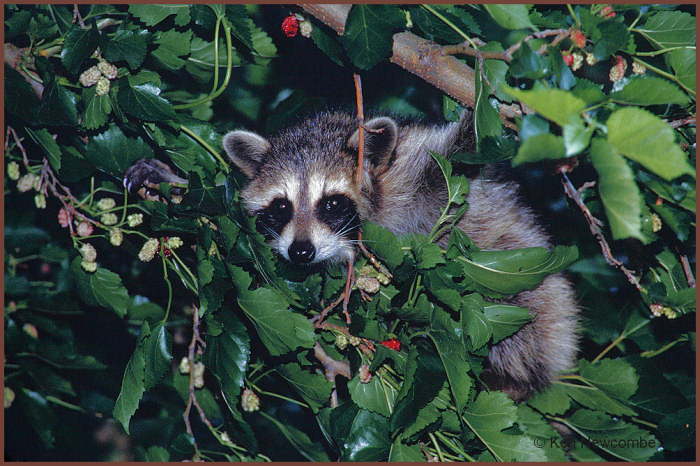
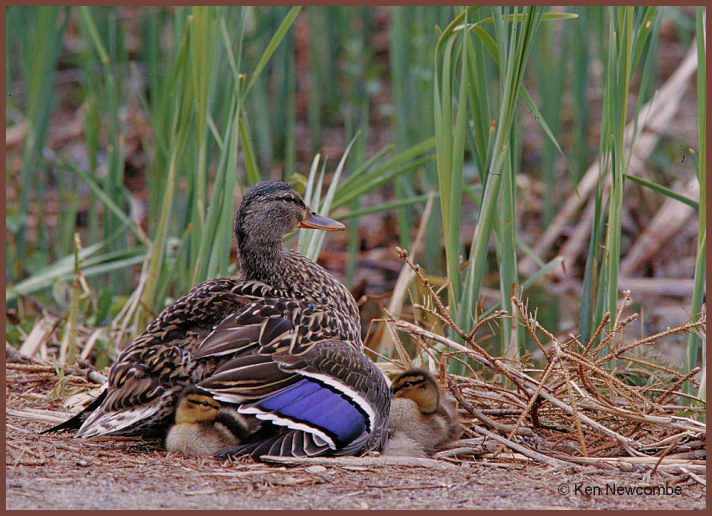
What to do with the thousands of slides that have been taking up space in my closet for the last few decades. The better ones are stored in 24 Kodak slide trays, the seconds are stored in boxes. Each Kodak Carousel Slide tray holds 140 slides and I had to decide what to do with them, they were not properly cataloged though they were stored by category, e.g.. plants wildlife, birds etc. It was clear I needed to digitize and catalog the best of them if I was to get any use out of them at all. I have an older Minolta Dimage slide scanner but the time to scan each slide is two minutes or more and buying a new scanner for a one time project is out of the question - I have enough gadgets and software to look after as it is! I decided to use a digital camera equipped with a macro lens to copy the slides. After all an 8 -10 megapixel camera chip has similar resolution and dynamic range to a slide scanner and is much quicker. I designed a simple rig with plastic pipe that would allow me to crop if necessary and be durable enough to get me through this project. To test the quality of the scan I set up a digital projector as well as my old Carousel slide projector and compared a few slides side by side. The copied slides were shot in RAW, converted to TIF with breezebrowser and then had levels and color balance corrected in Paint Shop Pro, this is how I would process any digital camera image. The final digital file was then projected with my Epson digital projector beside the Carousel projected image. My impression was that the digital image looked better in many cases than the original projected slide! Digital images were brighter and appeared to be sharper with a bit more detail. Shadow detail was about the same but color was more accurate do to color correction and sharpening in the editing process. The Carousel projector would not get both the center and corner of the image sharp at the same time do to slide curvature, a common problem when projecting slides. Digital images do not have this problem. Some high contrast slides took considerable Paint Shop Pro work to make them look good but most could be made to match or better the Carousel projected image. Slides tend to be very high in contrast compared to other photographic media and a heavy hand is necessary to being out the shadow detail using the "fill flash" tool in Paint Shop Pro. Overall though the quality was acceptable and seemed to me to be at least as good or better than my Minolta Dimage scanned slides from several years back. I found it took about one hour to scan 140 slides. I then downloaded them to the computer filed them as RAW images and edited only a few as TIFs leaving most unedited until they are needed.
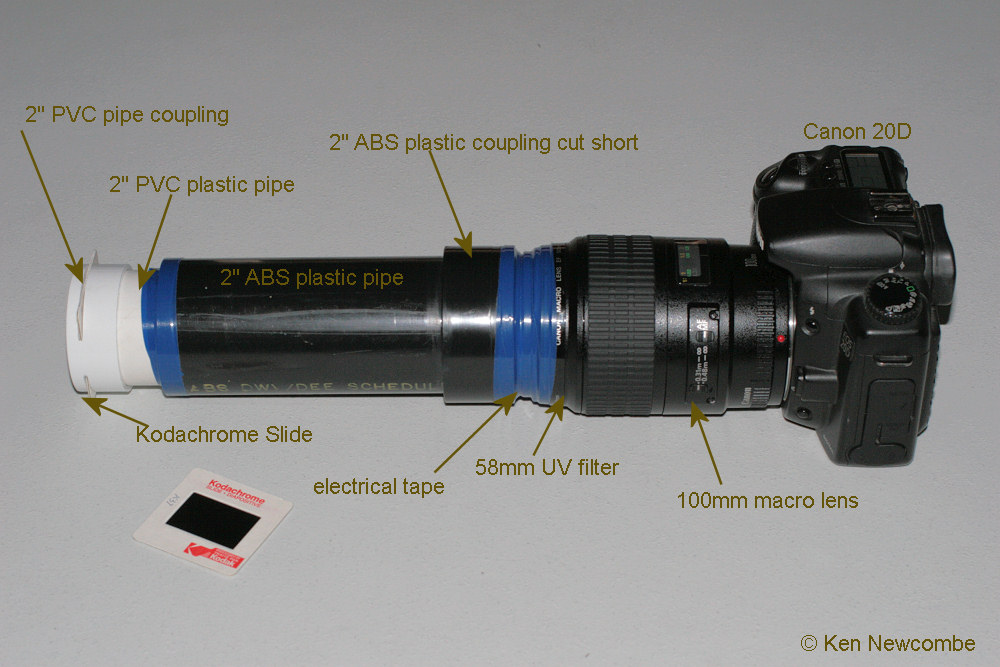
Parts List:1 - Roll of vinyl Electrical tape (any hardware store)
2 - UV filter to fit your macro lens (mine is 58mm)
3 - 100mm macro lens
4 - Digital camera (Canon 20D)
5 - 2" ABS pipe 5 1\4" long and a pipe coupling (any hardware store)
6 - 2" PVC house vacuum plastic pipe 4-5" long (any hardware store)
7 - 2" PVC house vacuum plastic pipe coupling (any hardware store)
8 - ABS plastic pipe cement (any hardware store)
Tools:
1 - Miter box and hand back saw
2 - hacksaw
3 - emery cloth and thin flat file
4 - 12 inch ruler
Assembly:
I cut the pipes with a miter box and back saw to insure a square edge then sanded with fine emery cloth to remove the bur. The ABS black pipe is glued to the coupling with ABS cement. The coupling is then taped to the filter with electrical tape to hold it firm. This may require shimming if your filter is smaller than 58mm. A white plastic PVC pipe coupling is cut with a hacksaw to hold the slide. This may take some finesse and filing to get the cut width correct to hold the slide square to the pipe. The white coupling is then slide onto the white pipe end, no glue is needed. The white PVC pipe is slide into the black ABS pipe. With a slide in the holder cap slide the white pipe in and out while looking through he camera viewfinder until the image is the correct size in the frame (focus first) then tape the pipes together and you are done!
To copy a slide:
Set the camera in Av mode aperture at f5.6, ISO 100 and set the 2 second timer and mirror lockup ON to reduce vibration at the slow shutter speeds you are likely to use (1\10-1\50 second), aim the camera at a window with blue or white sky to provide diffuse light. Focus the lens manually. Shoot, access the histogram, compensate the exposure accordingly as you would any image.
Tips:1 - Clean each slide with a blower brush before copying.
2 - Using a lens other 100mm may require a different black pipe length.
3 - Be sure your light source is diffuse and evenly illuminates the whole slide.
4 - Use ISO 100 for least noise and highest dynamic range. (shadow detail)
5 - Take two or more exposures. Slides are very contrasty and often require over 2 stops of exposure comp - do not blow the high lights!
6 - It may be necessary to slightly bend the pipes when aligning the slide if the rig is not square.
7 - Use "flash fill" shadow recovery or curves to adjust the contrast with your photo editing program
8 - Use manual focus but listen for the focus confirmation beep or watch the viewfinder focus indicator.
9 - Used your old camera to save the shutter on the new one!
10 -You may need to add some strips of tape to the white PVC pipe to shim it so it is not loose in the black pipe.
11- use f5.6 or f8 to get the sharpest image and insure depth of field sufficent to cover warped slides
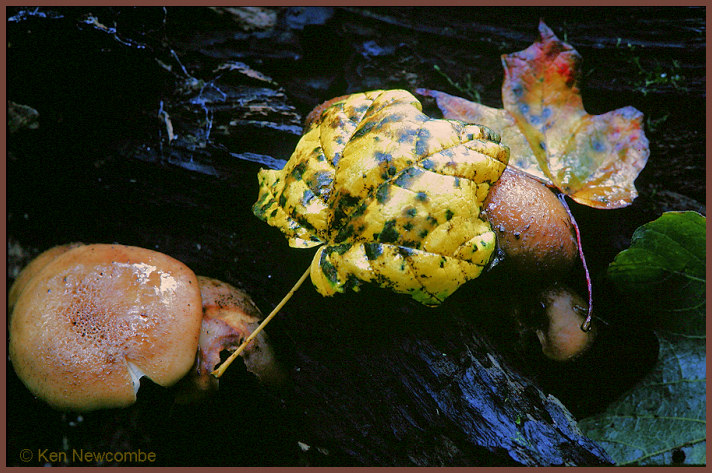
Camera Copied Slides